Thursday, 31 August 2017

Windows 10 Build 16241 gives the best sneak peek yet at the Fall Creators Update


As Windows 10's next big release date nears, the latest Insider Preview Build 16241 gives us a solid sneak peek at what the Fall Creators Update will look like. You'll see a some significant new features, including Ubuntu support, update delivery options, and improved Task Manager visibility. But tellingly, Microsoft also opened its final “bug bash” challenge. That means the Windows 10 team is just about ready to button up the OS for its promised September debut.

Build 16241 also shows it's serious because of the nature of its new features, emphasizing nuts-and-bolts improvements over new capabilities. For example, Windows 10 now offers a great deal more granularity into how Windows updates will be delivered, and how you can manage their bandwidth. Task Manager adds deeper insights into what’s going on with your GPU. Microsoft is also preparing for the launch of mixed-reality headsets with several updates to its MR capabilities.

Why this is important: Build 16241 marks the final lap in the race to the Fall Creators Update. Sure, it shows off some significant new features, but the simultaneous bug bash announcement signals that those will be the last additions. Remember, Microsoft has committed to a schedule of Windows upgrades in both March and September.That means the “shipping” version of the Fall Creators Update is just weeks away.

A greater degree of visibility within Windows

Massive Windows updates are part and parcel of owning a Windows machine. That doesn’t mean you have to like them, however. Part of the new Windows 10 Build 16241 includes what Microsoft calls Delivery Optimization Advanced Options, where you’ll be able to manage how much bandwidth Windows uses for updates. Typically, Windows tries to throttle itself so as not to not monopolize your connection. If you’re on a low-bandwidth pipe and watching Netflix, for example, the amount of Windows update data will slow to a crawl.

What Windows doesn’t know, however, is how much bandwidth is being used across your network, not only by other phones and PCs downloading information from the Internet, but also how much data is being sent from device to device. Now, you can manage that data.

That’s important for two reasons: The first is just the impact on your own network performance. But for those who live in rural areas or have signed up for a broadband plan with a strict data cap, managing that flow of information can be vital. Remember that your PC can also be used as a local “node” to send updates around the neighborhood, though you can turn that off.

To show how much data Windows actually requires, Build 16241 includes the new Activity Monitor, which tracks data to and from your network, specific to Windows and its updates.

If this level of visibility appeals to you, you’ll probably be happy to learn that Microsoft tweaked the GPU portion of Task Manager once again. Now, you can view the active GPU’s name and see which of its functions (including 3D, video decoding and video processing) are currently active. Microsoft also applied more descriptive labels to the tab processes used by Microsoft Edge, allowing you to see whether a particular Web page is slowing your system down, or a more generic service.

Prepping for mixed reality


Microsoft includes support for some fun in the latest build, too. Linux fans should be happy to know that the Bash shell now supports Ubuntu—an app that can be downloaded from the Windows Store.

Microsoft has also begun hammering out bugs within its mixed-reality devices—which have yet to begin shipping. It’s unclear whether headsets like Acer’s mixed-reality devices, which were shown off at the Build conference in May, will be ready in time for the Fall Creators Update launch, but Microsoft is apparently working hard to support them. The latest build includes support for USB motion controllers (with wireless support pledged soon) as well as a host of other improvements, including speech commands and a better teleportation experience. (In MR, users “jump” from spot to spot using what Microsoft calls “teleportation.”

We expected Microsoft to take a somewhat conservative approach to the Windows 10 Fall Creators Update, and so far it seems to be paying off. Assuming that the bug bash goes smoothly, that gives Microsoft about five weeks before September begins, and some wiggle room within that to ship the “final” version of the Fall Creators Update. Look for more of the pieces to fall into place over the coming weeks.

10 basic iOS tricks every iPhone owner should know


From message stickers and 3D Touch to Live Photos and Apple Pay, iOS is stuffed with attention-getting features that grab headlines and demand rounds of applause at Apple keynotes. But some of iOS’s most useful features are, in fact, the oldest ones. They’re easily overlooked, particularly by new iPhone and iPad users.

Read on for 10 basic iOS features that every iPhone owner should know, like how to take a screenshot, the ability to long-press your way to draft Mail messages, a physical button that doubles as the Camera app’s shutter release, and more.

Take a screenshot

One of the oldest iOS features around also happens to be one of the most powerful: the ability to quickly snap a photo of whatever’s on your iPhone’s (or iPad’s) screen. It’s handy for everything from documenting buggy iOS apps to quickly sharing a text message thread with a friend.

To take a screenshot, just press the Sleep/Wake and Home buttons at the same time; when you do, the screen will flash and you’ll hear a telltale camera snap. You’ll find your screenshot sitting in the iOS Photos app’s Screenshots album or in your Camera Roll. From there, you can share it by tapping the Action button (the square button with the upward arrow).

Unfreeze a frozen iPhone

Every once in awhile, your iPhone may come to a grinding halt, perhaps because of an errant app, or maybe iOS itself has wandered into a corner that it can’t get itself out of.

Generally speaking, quitting a frozen app (by double-clicking the Home button, then swiping up on the app’s multitasking card) is enough to fix the problem. You could also try a standard restart (press and hold the Sleep/Wake button until the “slide to power off” slider appears).

But if an app remains stubbornly stuck—or, worse still, if iOS becomes completely locked up—there’s another way to get things moving again: by force restarting your iPhone (a.k.a., a “hard” reset).

On pre-iPhone 7 models: Press the Sleep/Wake and Home buttons—but instead of letting them go immediately as you would when taking a screenshot, keep holding them until the screen goes blank. In a moment or so, you should see the Apple logo, a sure sign that your iPhone (or iPad) is rebooting itself.

On iPhone 7 or iPhone 7 Plus: Press and hold the Sleep/Wake and volume-down buttons until you see the Apple logo.

Take a picture with volume buttons

Keeping your iPhone steady while snapping a photo can be tricky when you’re trying to tap the shutter-release button on the slippery touchscreen.

If you miss the feeling of a physical shutter release, here’s a tip: pressing either of your iPhone’s volume buttons will also take a picture, handy for snapping photos while holding your iPhone firmly in both hands.

Silence the incoming call ringer

Whenever you duck an incoming call by tapping the Decline button or double-clicking the Sleep/Wake button, you send the caller straight to voicemail. That might be fine if you’re declining an unknown or spam caller, but you might want to think twice before sending your touchy boss directly to voicemail purgatory.

Instead, try clicking the Sleep/Wake button once instead of twice. Doing so will silence the ringer without sending the caller straight to voicemail. After a few rings, they’ll roll naturally to voicemail, just as if you were simply unavailable to take the call rather than declining the call outright.

Type in all-caps

Nope, there’s not a separate Caps Lock button on the stock iOS keypad, but there’s still an easy way to type in all-caps mode: just double-tap the Shift key.

When you do, the Shift button will turn bold, and you’ll see a little underline just beneath the arrow. To go back to standard typing mode, double-tap the Shift key again.

Type characters with accent marks


Just because you don’t see any accent marks in the stock iOS keyboard doesn’t mean they’re not there.

To type, for example, “voilà” instead of “voila,” tap and hold the “a” key. When you do, a pop-up with a series of accents will appear, everything from acute and grave to circumflex and umlaut. Slide your fingertip to the accent mark you want to type, then release.

Shake to undo


When you’re tapping out a message but have a sudden change of heart about how to phrase your thought, there’s an easier way to start over besides tapping the Backspace button over and over.

Instead, just shake your iPhone; when you do, an Undo Typing pop-up will appear. Tap the Undo button to undo what you just typed. To redo the typing you just undid, shake your iPhone again.

Jump directly to your draft Mail messages


If you tap Cancel while composing a new Mail message, you’ll get the option to save the unfinished message as a draft. All well and good, but retrieving a saved draft message the regular way—that is, by tapping the Mailboxes button and navigating to the Drafts directory—can be a royal pain, particularly if you’re using multiple email accounts on the iOS Mail app.

Luckily, there’s a handy but hidden shortcut that will take you to all your Draft messages, regardless of which account you created them in: just tap and hold the Compose button. To continue a draft message, tap to open it, or swipe to delete it.

Create an event directly from a Mail message


If you receive, say, an invitation to lunch via email, there’s no need to memorize the date and time and plug them into a new Calendar event.

One of Mail’s handiest features is its ability to detect dates and times within a message. Mail will underline the date within the body of the message, and it will also put an “Event found” banner at the top of the screen.

Tap the underlined date (or just tap the “Event found banner”), then tap Create Event. When you do, a new calendar event will slide into view, with the date and time already filled in. Just fill in any additional details, then tap Add.

Put a website shortcut on your home screen

If there’s a site that you’re constantly visiting on your iPhone, you can create an icon for the site and pin it to your home screen. Once you’ve created the icon, it will act just like a standard app icon, meaning you can tap and hold it to rearrange it on your home screen, tuck it into an app folder, or even put it into the app dock.

Just visit a site in Safari for iOS, tap the Action button (the square one with the upward arrow), then tap Add to Home Screen. You’ll have a chance to rename the icon before you pin it to the home screen.


Wednesday, 30 August 2017

Asus ZenBook laptops power up with quad-core CPUs and discrete Nvidia graphics

Bigger power comes to Asus' slim, light laptops.

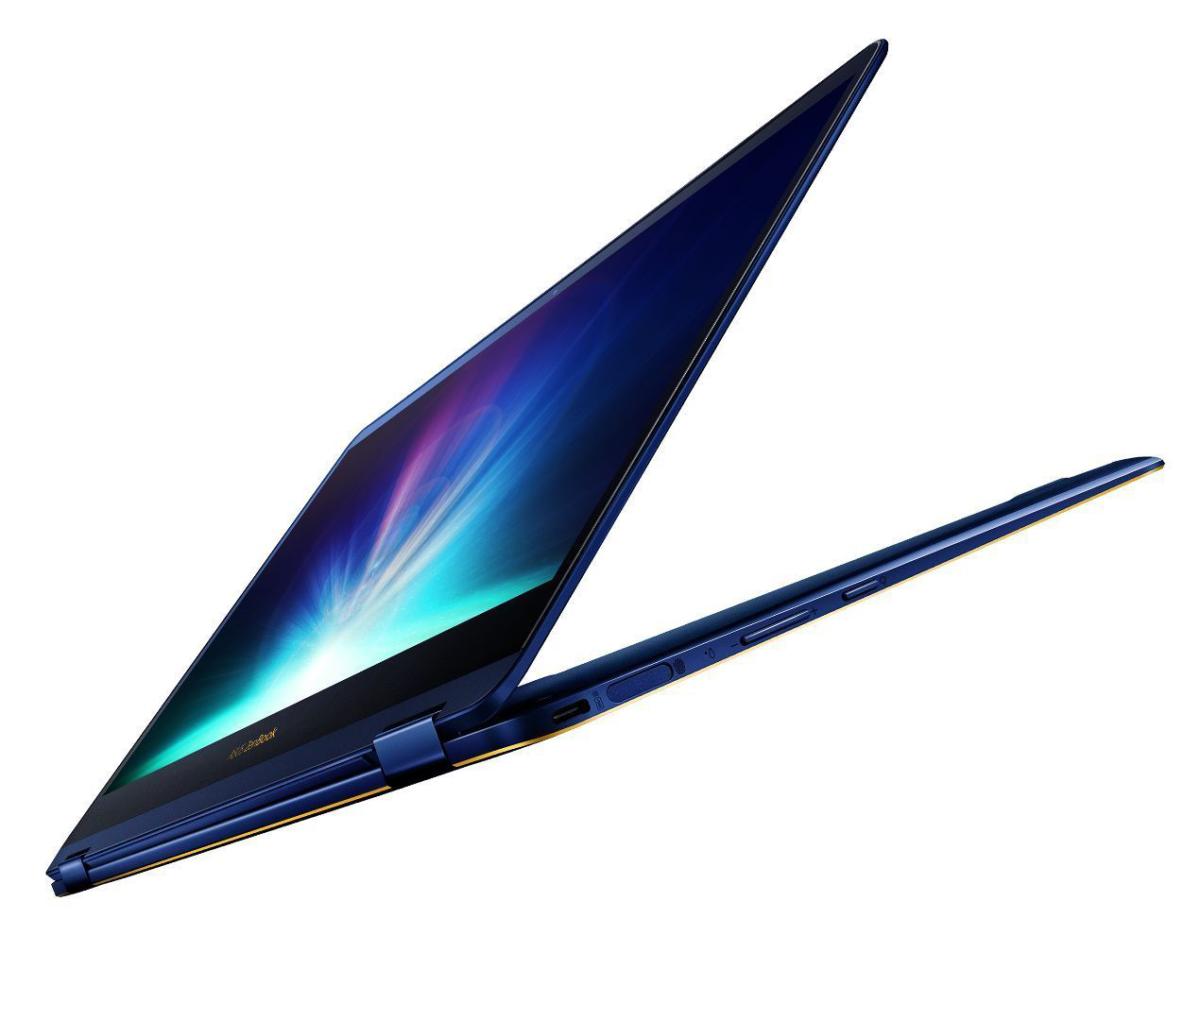
The battle over thin and light notebooks flared back to life at IFA 2017 on Wednesday. Mere hours after Acer revealed the Switch 7 Black Edition, a 2-in-1 laptop with a detachable keyboard and dedicated graphics chips, Asus unleashed an army of svelte new ZenBook laptops equipped with Intel’s new quad-core 8th-gen Core CPUs and discrete Nvidia GPUs of their own. We loved the last ZenBook Flip that crossed PCWorld’s test bench, so let’s dig in!

Asus beat the drum loudest for the ZenBook Flip 14, which it calls “the world’s thinnest 2-in-1 laptop with high-performance discrete graphics.” The 13.9mm-thin laptop packs the same somewhat mysterious GeForce MX150 chip as Acer’s Switch 7 to achieve that feat. Nvidia says the MX150 is three times more efficient and 30 percent faster than the GeForce 940MX it replaced. The laptop’s no slouch in other areas either, with a quad-core Core i7 processor, 16GB of RAM, and a 512GB PCIe SSD.

The ZenBook Flip 14 includes niceties beyond swanky graphics and a small size, though. Audio duties are handled by Harman Kardon, and the notebook packs a fingerprint sensor for Windows Hello biometric authentication. A “NanoEdge” bezel let Asus include a 14-inch 1080p panel while giving the laptop a similar footprint to most 13-inch notebooks—and that display can flip a full 360 degrees.


The ZenBook Flip 15 is a bit larger and swaps out Nvidia’s MX150 chip for gamer-friendly GTX 1050 graphics. Asus puts the extra space to good use, offering your choice of 1080p and 4K displays with a 178-degree field of view, Thunderbolt 3-equipped USB-C ports, and up to a 2TB hard drive in addition to everything you find in the Flip 14.

Asus says the Flip 15 is the most powerful ZenBook Flip ever. If you want to push your gaming experience even further, the company also announced the ROG Station X2. This second-generation Asus graphics card dock lets you power up your laptop with full-blown desktop graphics cards. It connects over Thunderbolt 3.

The ZenBook Flip S is even smaller than the itty-bitty Flip 14, measuring in at just 10.9mm thick with a 2.42-pound heft. Despite that tiny size the 2-in-1 harbors an 8th-gen Core i7-8550U processor, a 1TB PCIe SSD, and a fingerprint reader, as well as an option to upgrade to a 4K display.

The 14-inch ZenBook 3 Deluxe and 13-inch ZenBook 13 lack the rotatable displays of the Flip models but offer similar upgraded amenities, including thin-and-light designs, 8th-gen Intel Core processors, PCIe SSDs, Thunderbolt 3 ports, and tiny NanoEdge bezels. The ZenBook 13 also includes Nvidia’s GeForce MX150 discrete graphics. The company’s slightly thicker, but more affordable VivoBook laptops received the 8th-gen CPU treatment, too.

Availability and U.S. pricing for the ZenBook laptops weren’t announced. On the opposite end of the notebook spectrum, Asus’ ROG gaming brand revealed the ROG Chimera, a hefty gaming rig that brings buttery-smooth 144Hz G-Sync displays to laptops.


Speed up Windows 10: Tips for a faster PC


Your Windows PC too slow? Here are nine speed tips to give your PC a performance boost without spending a dime.

Your computer is slow. Annoyingly slow. You can add RAM, or buy a faster SSD, but that costs money. No, the first thing you should do is try to make Windows faster. Thus we present nine ways to speed up your Windows 10 PC without spending a dime.

1. Give it the reboot

If your PC is behaving horribly slow, try rebooting. Yes, it’s an obvious solution, but people tend to forget the obvious.

The sleep or hibernate setting will save power, but only a full reboot clears out the cobwebs in Windows’ brain and gives it a fresh start. Do it every day if the PC is really slow.

2. Turn on High Performance


Windows assumes that you want an energy-efficient computer. But you can trade electricity for speed. Use this tip only if you’re willing to increase your electric bill and decrease your battery performance.

Right-click the Start button and in the resulting menu, select Power Options.

In the resulting Control Panel window, pull down the Show additional plans option. Select High performance.

3. Undo some appearance options

Windows works hard to make the screen easy on the eyes. If your PC is underpowered, you may want to sacrifice aesthetics and gain some speed.

Right-click Start, and select System. In the resulting Control Panel window’s left pane, select Advanced system settings.

This brings up the System Properties dialog box, already on the Advanced tab. Click the Settings button in the Performance box (the first of three “Settings” buttons on this tab).

This brings up another dialog box. You can uncheck some of the options, or simply select Adjust for best performance.

4. Remove unneeded autoloaders

A whole lot of programs want to load automatically every time you boot. Each one slows down the boot process, and some continue to slow down Windows afterwards.

These are not all bad. Your antivirus program should load when you boot and keep running as long as your PC is on. Other programs that need to run in the background to work, such as OneDrive, should also autoload.

But some programs—even good ones that you use frequently—don’t really need to run all the time. You don’t want to uninstall those, but you may want to stop them from autoloading.

To see how bad the situation is, right-click the taskbar and select Task Manager. Click the Startup tab. (If you don’t see any tabs at the top of the window, click More details in the lower-left corner.)

The Startup tab will show you all the autoloading programs. As you examine the list, think about what programs don’t really need to keep running at all times. To stop one from loading automatically, right-click its entry on the Startup tab and select Disable.

If you don’t recognize the name of an autoloader, right-click it and select Search online to help you find more information.

5. Stop hog processes


Your computer may be running a poorly written process that’s hogging a lot of resources. To find out, right-click the taskbar and select Task Manager. (Once again, if you don’t see any tabs at the top of the window, click More Details.)

On the Processes tab, click the CPU column header to sort by processor usage. The top items will be the ones hogging the CPU. (If the top processes are all using 0%, the processes are sorted in the wrong direction. Click the column header again.)

Don’t assume that the top process is necessarily a hog. Some big applications are worth the CPU cycles. One way to manage these programs is to close them when you’re done with them. Another is to switch to a smaller program.

If the hog is Windows Driver Foundation, see this Windows Club article.

You can close a process from inside Task Manager. Select the process and click the End task button and confirm your decision. But this should be avoided.

When you’re done, click the Memory column header and repeat.

6. Turn off search indexing

When you search for a word across all the files in your Documents library, the results come up almost immediately. That’s wonderful, but it comes at a price. When you’re not searching, the indexing needed to create those fast searches slows you down.

To turn off all indexing:

1. Open Windows Explorer, right-click your C: drive, and select Properties.

2. On the General tab, uncheck Allow files on this drive to have contents indexed in addition to file properties.

3. In the resulting warning box, select Apply changes to drive C:\, subfolders and files.

Windows may take some time turning off the indexing. Get up and take a walk; it’s good for you.

There’s another option that will let you turn off some indexing but not all of it:

Type indexing in the Cortana field. Select Indexing Options. Click the Modify button near the lower-left side of the resulting dialog box.

This brings up another dialog box, with two sections. And yes, it’s confusing. Start in the bottom section of the dialog box, Summary of selected locations. Click any of these options, and it changes the contents of the top section, Change selected locations.

7. Turn off Windows tips
Windows 10 occasionally gives you tips about how you can better use the operating system. The problem is that, in order to see what tips you need, it keeps an eye on how you’re using your PC.

Yes, that sounds worrying from a privacy issue, but it also slows down your PC.

To turn it off, click Start > Settings. Select System, then select Notifications & actions in the left pane.

At the bottom of the Notifications section, turn off Get tips, tricks, and suggestions as you use Windows.

You might also want to explore the other notification options, and turn some of them off, as well. I don’t think any of the others slow down the PC, but they can get annoying.

8. Clean your internal drive

If your internal storage is almost full—whether it’s a hard drive or an SSD—that could be slowing you down. But if your drive has plenty of free room, skip this section.

Start with Windows’ own Disk Cleanup tool. In the Cortana field, type disk and select Disk Cleanup.

Wait while Disk Cleanup examines your drive. Click the Clean up system files button (this time you’ll need an administrator password). Then wait again for another examination.

Examine the options. If you find one called Previous Windows installation(s), you’re in luck. By checking it and clicking OK, you’ll free up a lot of space. You can check other items to get rid of them, as well.

Something else you might want to consider: Uninstall programs you no longer use.

9. Check for Malware

I doubt an infection is intentionally slowing down your PC. There’s no illegal profits from that. Plus it's a sure-fire way to trigger a victim's suspicions.

But some malicious code could be slowing down your PC, even if that wasn’t the criminal’s intention. So if you’re suspicious, read Eric Geier and Josh Norem’s guide on how to remove malware from your Windows PC.

If after performing these tips, your PC still feels sluggish, it might be time to upgrade your hardware. Start here, with PCWorld's recommendations of killer, but shockingly cheap PC upgrades.

20Wh 7.4V New Battery Dell TM9HP For Dell Latitude 13 7350 Ultrabook

CrashPlan alternatives: What home users can do, from staying put to exploring other services

The easiest way out (if not the cheapest)? Just upgrade to Crashplan's business tier.

It's been a week since CrashPlan decided to call it quits on its personal backup service. But CrashPlan isn't going away—it's just ending a program that probably wasn't profitable. After the initial shock, home users should realize there’s absolutely no reason to panic—or even be hasty. The company will keep your data safe for an extra 60 days past the end of your current subscription, and it will keep its servers online until October 23, 2018. But it's still a good time to figure out your next move, so we'll walk you through the options.

CrashPlan option 1: Upgrade to a business plan


You needn't leave CrashPlan at all if you turn your home plan into a business plan. Just pony up the $10 a month for the small business plan and keep on keepin’ on. The company (Code42) is also offering a 75% discount to users for the first 12 months.

CrashPlan option 2: Free or cheap alternatives

If the business plan doesn't fit your budget, then what you need to do depends on how you used CrashPlan. If you simply maintained a backup of your current data with the service, you don't even need to download your backup from CrashPlan. Just start backing up elsewhere.

There are any number of free services for small data sets: 15GB Google Drive, 5GB iCloud, 5GB OneDrive, and 5GB Dropbox. You may also choose from low-cost tiers of pay services, including the one CrashPlan recommends—Carbonite. In fact, Carbonite is offering a 50% discount for CrashPlan users.

CrashPlan option 3: Download archives


If you used CrashPlan for archiving—that is, you stored data on the company’s servers without keeping a local copy—then you’ll need to download that to your local PC before your subscription ends (plus the 60-day extension). The CrashPlan servers might be a tad stressed right after the announcement, but wait a couple of weeks and you should be able to download without undue delay. If you procrastinate, you could always move to the $10-a-month business plan until you got your act together.

CrashPlan option 4: External backup


If CrashPlan was your only backup, now is a good time to consider backing up your backup—combining a cloud service with backup to an external drive. Check out our backup software reviews to find our recommendations.

Note: This article was edited to capitalize the "P" in CrashPlan at the request of the company, as well as to note the one-year 75% discount for exiting users when they change to the business plan.


Tuesday, 29 August 2017

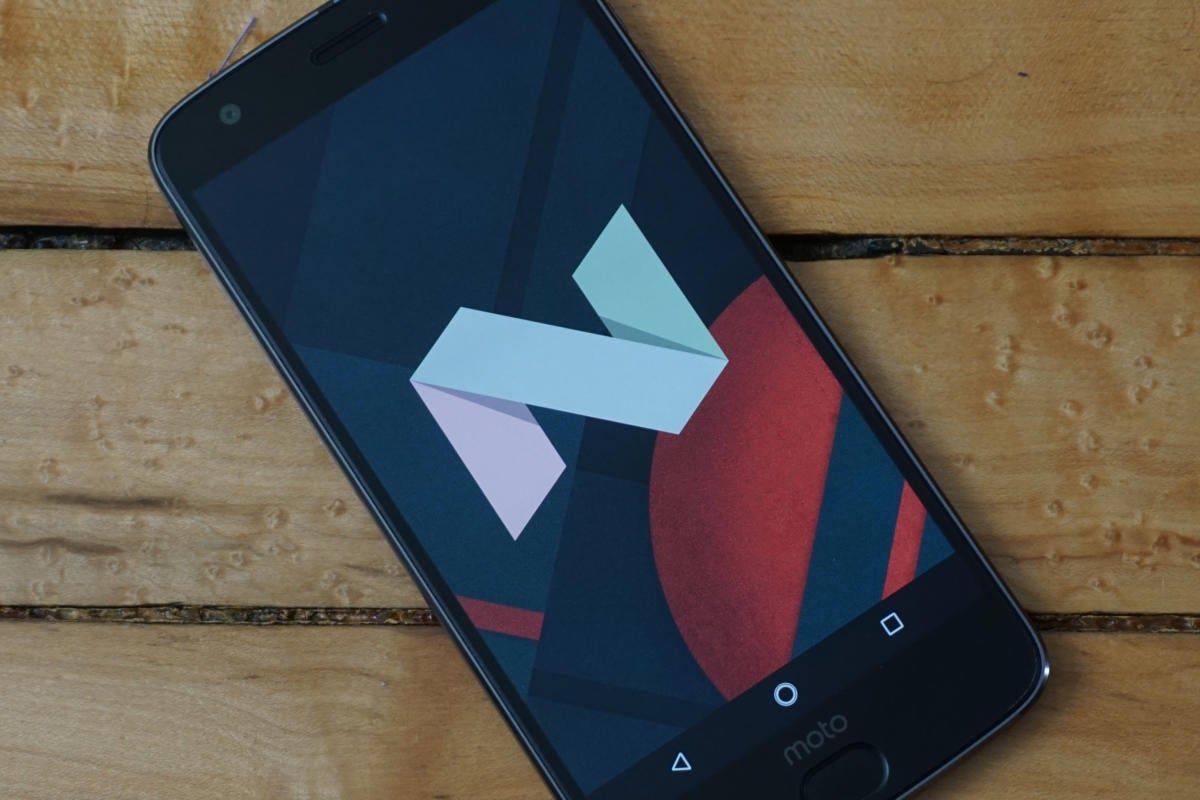
8 cool Android Nougat features you’re probably not using


Google used to produce a rather bare-bones version of Android, counting on OEMs like Samsung and LG to add in all the other cool features people might want. But today’s stock Android is more powerful, more feature-rich, and more attractive without any help from the device makers.


In fact, Google has pushed OEMs to use even more of the basic Android experience without making unnecessary changes. This could mean some awesome features are lurking inside your phone that you don’t even know about. So here are eight cool features inside Nougat (Android 7.0) you’re probably not using.

Split-screen Chrome

Android 7.0’s split-screen app capabilities are well known, but there’s one app that includes a very cool and useful feature that isn’t so obvious: The Chrome browser lets you run two different tabs on the screen at once.

To run two webpages in split-screen, open Chrome and ensure you’ve got at least two tabs open. Long-press your Android overview button (it’s the one shaped like a square, right next to the home button) to launch split-screen mode as you normally would. Now tap the overflow menu button in Chrome, and select “Move to other window” (see screenshot above).

The tab you have up will move over to the other side of the split as a second instance of Chrome. When you’re done, exit split-screen mode by dragging the divider to one side. The tab will go back into your single Chrome instance. You can also close the tab and open a different app in split-screen mode.

Clear all apps in multitasking

Sometimes you just need to start fresh in your overview screen, or shoo away all those open apps. Not all Android devices offered a quick way to do that before, but as of Android 7.0, there’s a proper “clear all” option for the overview list on all devices.

Some OEMs like Samsung and LG make the Clear All button very accessible at the bottom of the screen—maybe even too accessible, as you can accidentally hit it and close all your open apps. On Google’s build of Android (and those based closely on it, like Motorola’s), you can find a Clear All option at the top of your stack of apps. Just scroll all the way up, and you can press the button to remove all apps. Importantly, this does not clear background tasks—it only ends user-facing activity.

Third-party quick settings

All phones and tablets running Android 7.0 include a customizable quick settings panel. However, there’s another aspect of this feature that might interest you. You can also use third-party quick settings tiles on any device. To find out if you have any, open the quick settings and tap the edit button (it looks like a pencil).

Below the main list of settings is a selection of unused tiles. Any apps you’ve installed that have their own quick settings tiles will show up here. You can long-press and drag to add or remove apps. You can get quick access to things like VPN connections (PIA), a Twitter client (Flamingo), and a variety of custom settings (Tile Extension for Nougat).

App install source

Google has gradually been beefing up the information available in your app settings interface. Nougat added a particularly cool new feature: You can now see where an app came from—Google Play or a sideloaded APK.

To find this bit of info, open your system settings and select “Apps.” Pick any app in the list and scroll down to the bottom of the info screen. It will say either “App installed from Package Installer,” or “App installed from Google Play Store.” For those apps installed via the Play Store, you can tap the embedded link to go right to the app’s listing in the Play Store. The package installer link for sideloaded apps won’t do anything, though.

Quick app switching

Google revamped the multitasking interface back in Lollipop, but Android 7.0 offers a new, faster way to flip between apps. If you need to get back to the last app you had open, you don’t have to tap on the card in the overview screen.

Just double-tap the overview button, and you’ll switch to the last app. Do it again, and you’ll return to the app you just left. This should work on all Android devices running Nougat or higher.

App shortcuts


Google’s new app shortcuts (previously known as launcher shortcuts) are one of the few new features that rolled out as part of Android 7.1 Nougat. That means phones and tablets on 7.0 won’t have them. But for those devices that do have app shortcuts, you now have faster access to useful menus and features right from your home screen. All it takes is a long-press on the app icon.

With the long-press menu up, you can tap on the list of shortcuts to open the app to the corresponding screen or action. For example, Google Drive has search, scan, and upload as app shortcut options. Settings has battery, data usage and Wi-Fi. The phone dialer will show you options for frequent contacts.

There’s another layer here: If you find yourself often going to the same place and doing the same thing in an app, you can make the long-press app shortcut into a regular home screen shortcut. Simply long-press on one of the shortcuts and drag it out of the pop-up menu. It becomes an icon that you can drop anyplace you want, and then launch it with a tap.

Pin apps to share menu

The Android share menu makes it easy to push links and files from one app to another. However, if you have a lot of apps installed, the list of apps and actions in the menu can get rather ungainly. There’s a little-known feature in Nougat that can help: If you’re frequently using the same few apps in the share menu, long-press on them in the menu. You get a popup that offers to link the app info settings or pin the app.

Pinned actions in the share menu always appear at the top of the list for easier access. But be aware, this works only in the native Android share menu. If an app implements its own version of the share activity, your pinned apps may not be visible at the top.

Data saver

Most of us have to live with capped mobile data plans, but Android 7.0 added a new feature that can help you stay under the cap. The aptly named Data Saver feature is available on virtually all Nougat phones under the Data Usage settings menu. Data Saver lowers your mobile data usage by preventing apps from using data in the background. Just turn it on, and apps will pull down bytes only when you’re actively using them.

All phones have at least a few apps and services that are exempted from the Data Saver restrictions. You can see which ones have unrestricted access in the Data Saver settings (they’re usually Google Play Services, notification handlers, and other system components). You can turn unrestricted access on or off for any app, but be aware you might break things.

There’s still a lot of neat stuff lurking inside Nougat. And with Android O just around the corner, just think of all the surprises to come.

4300mAh/32WH 7.4V New Battery Dell YN6W9 For 7.4V 32WH

43Wh 11.1V New Battery Dell D2VF9 For Dell Inspiron 15 7547

4400mah 11.1V New Battery ACER UM09A71 For Acer Aspire One ZA3 ZG8

45W Type-C Laptop AC Adapter for ASUS ZenBook 3 UX390 UX390U UX390UA

5000mAh/6Cell 11.1V New Battery Acer AL14A32 For Acer ASPIRE E5-521 ASPIRE E5-521G ASPIRE E5-531

How to test your home internet connection speed


Testing your internet connection’s performance is a straightforward exercise. You don’t need any extra software—all you need is a computer with a web browser. But there are also a few things you can do to make sure you are getting the most accurate reading of your internet connection. Here’s what to do.

Get ready

For best results, you want to use a wired connection if at all possible; that way, you don’t have to worry about interference and performance fluctuations that can occur while you’re on Wi-Fi. If you have any other wired devices on your home network, plug your test computer directly into the modem so those don’t interfere in your testing.

If you’re stuck using Wi-Fi—say, you have a MacBook Air or a tablet or some other device that doesn’t have an ethernet port—do what you can to minimize interference. Make sure your Wi-Fi router is away from other electronic devices like cordless phones, and temporarily disconnect any other devices from your Wi-Fi network—after all, you don’t want another computer on your network to download a gigabyte worth of software updates while you run your tests.

While you’re at it, double-check to make sure your computer isn’t downloading something in the background. Check the Task Manager on Windows (summoned by pressing control-alt-delete) or Activity Monitor on MacOS, and look for network statistics (it’s labelled “Network”on MacOS, “Networking” on Windows).

Close or quit all apps on your computer to keep apps from downloading software updates while you test your connection. Your bandwidth usage may not drop to zero and stay there, but you want it as close to zero as it’ll get. If your operating system is downloading updates, there isn’t much you can do aside from wait and test your connection later.

If you’re having any problems with your connection, now is a good idea to reset your modem and router. Switch them off and unplug them for a few moments, then plug them back in and switch them on.

Test your connection

Ookla’s Speedtest.net is the most common site to test your internet connection; all you need is a web browser with JavaScript turned on (it usually is unless you switched it off) and Adobe Flash installed. There are a couple of alternatives if you don’t have Flash installed (and don’t want it installed). There’s an HTML 5 version of Ookla’s Speedtest.net, or you can use Speedof.me, which also uses HTML 5.

All you have to do at this point is click the green “Begin Test” button, and Speedtest.net will check both your download and upload speed. This may take anywhere from a few seconds to a few minutes, depending on your network speed.

Those aren’t your only options for testing your broadband connection; MegaPath also offers a speed test, as well as what it calls Speed Test Plus, which evaluates the quality of your connection in addition to its raw speed. Your ISP might also offer a speed test tool, though you may need to do a little poking around for it. And router manufacturers are increasingly including speed tests in their products’ firmware and/or the mobile apps they distribute with their products (although in that latter case, you’ll be using a wireless connection).

Isolate the problem


Don’t be surprised if you’re not getting the top speed your ISP says it can deliver—almost no one does. But if your connection is significantly slower than what was promised, many different factors could be coming into play. There might be a problem with your equipment, or it could be an issue on your ISP’s end. Most ISPs maintain a tech-support page where you can go to see if they're aware of any problems with their service. This link will take you to the location of AT&T's DSL troubleshooter.

If your ISP isn't reporting a problem, you can start your own troubleshooting by eliminating your equipment as a factor. First try using a different computer. If you get acceptable performance on the second machine, you can't blame the ISP. If the second computer also has a slow internet connection, run another bandwidth test after each of these suggestions: Try using a different ethernet cable to connect your PC to your router. Try swapping out the cable that connects your router to your internet gateway (your DSL, fiber, or cable modem). Troubleshoot your router: Turn it off or unplug it for a minute or two and then turn it back on. You should always be running the latest firmware on your router, so this is a good time to update it if you haven't lately. If you're still not seeing an improvement, try power-cycling your DSL, cable, or fiber modem.

If you've jumped through all of those hoops, and you're still have performance issues, it's time to call your ISP's tech-support line.

4300mAh/32WH 7.4V New Battery Dell YN6W9 For 7.4V 32WH

43Wh 11.1V New Battery Dell D2VF9 For Dell Inspiron 15 7547

4400mah 11.1V New Battery ACER UM09A71 For Acer Aspire One ZA3 ZG8

45W Type-C Laptop AC Adapter for ASUS ZenBook 3 UX390 UX390U UX390UA

5000mAh/6Cell 11.1V New Battery Acer AL14A32 For Acer ASPIRE E5-521 ASPIRE E5-521G ASPIRE E5-531

Popular Articles